This post may contain affiliate links, which means I’ll receive a commission if you purchase through my links, at no extra cost to you. Please read full disclosure for more information.
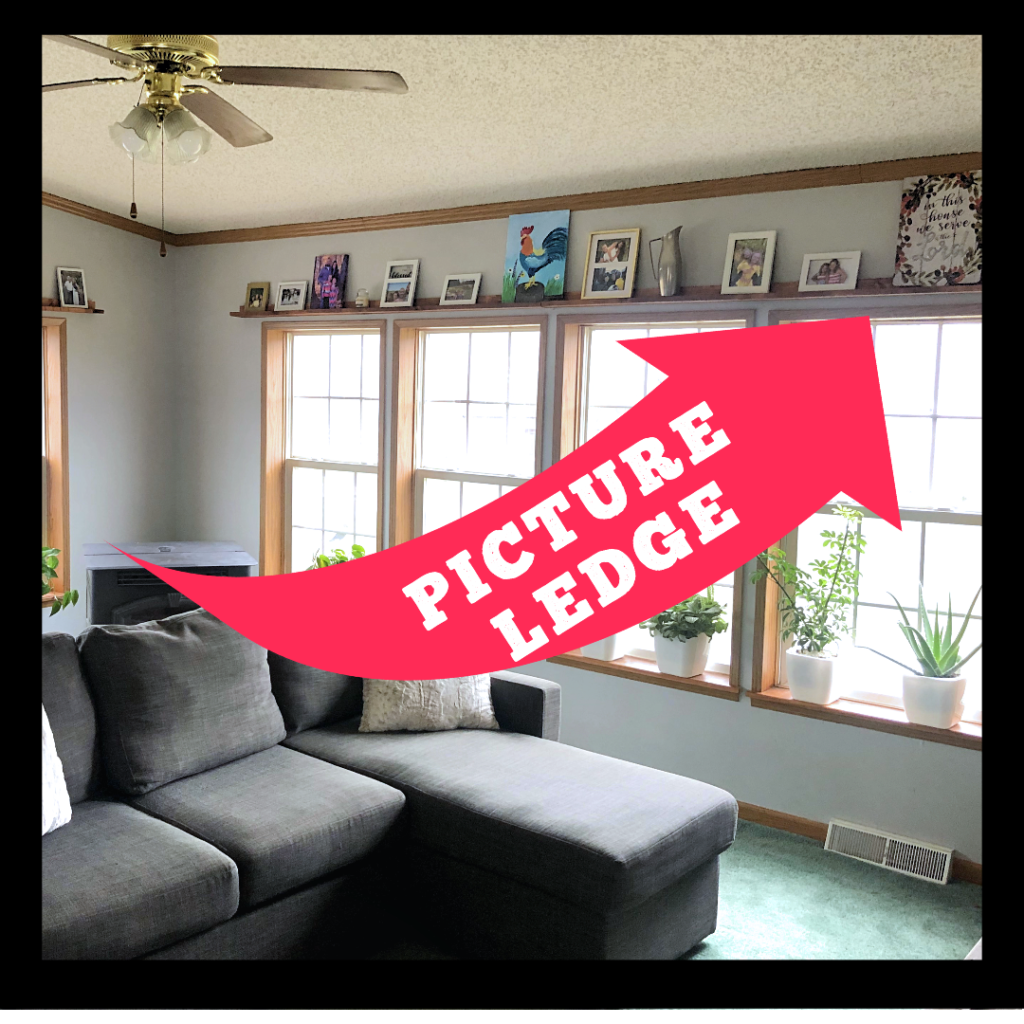
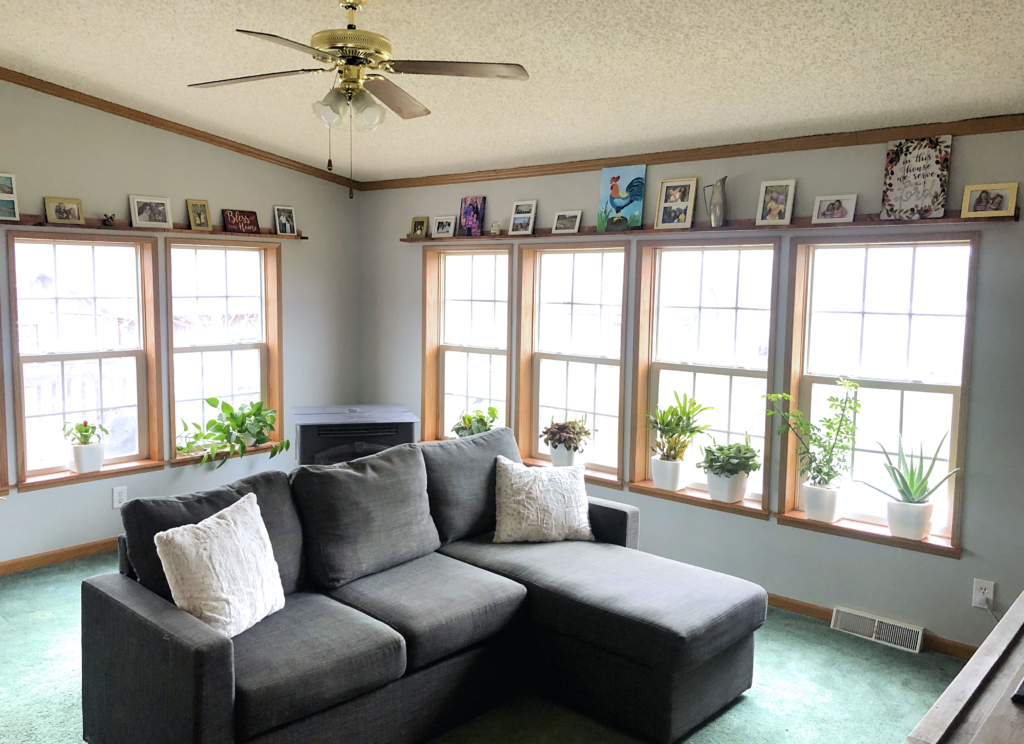
We are so fortunate to have so many windows in our current house. SO MANY! It’s even nicer that our house is secluded enough to not need window coverings. When we first purchased our house, it had yellowed 1990’s blinds, complete with 1990’s teal curtains. We also have lovely teal carpet. With all that teal, something had to give, so all the curtains had to come down. We lived with blank windows for years. I knew I didn’t want more blinds and I knew I didn’t want more curtains. I did however want something more than we had. After much scouring Pinterest for other ideas, I came across window clings, pennant flags and lots of plants. All good ideas and don’t get me wrong, I do love plants…ALOT! Then I found it, the picture ledge. Not a full shelf, but just big enough to hold picture frames and small objects. Yes please!
Materials
You will need only a couple basics and then you can dress up your picture ledge to fit your space.
1×4 pine boards
1.5″ wood screws
Drill
Sandpaper or a palm sander
Stud finder (optional)
Stain or paint (optional)
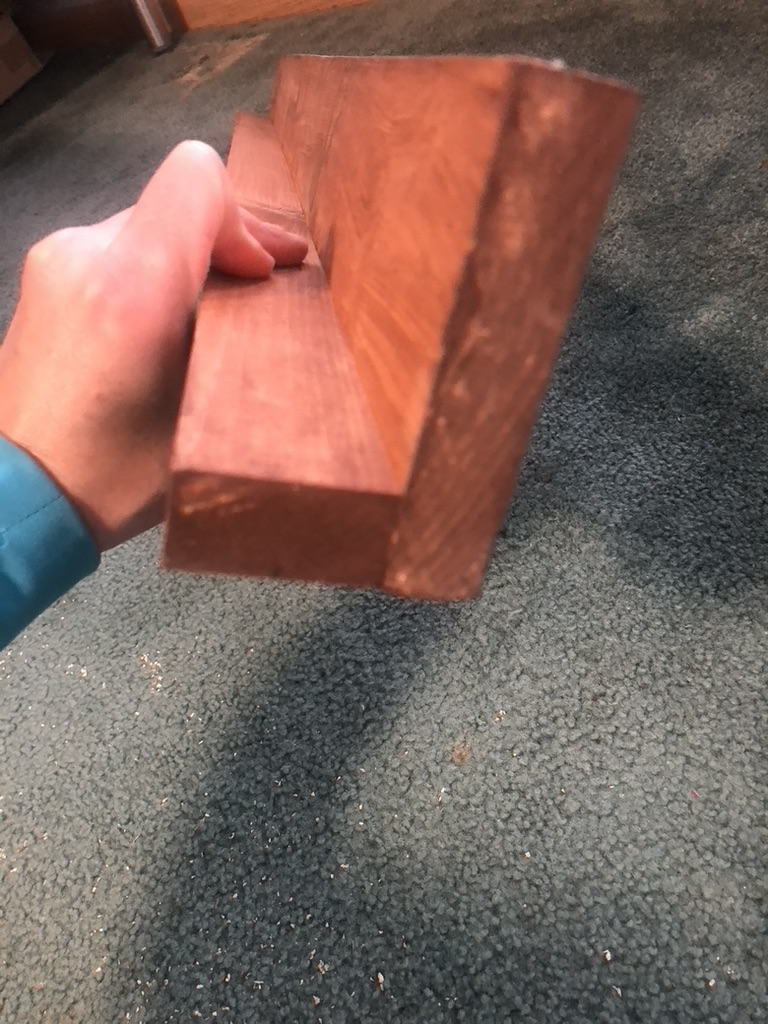
Measure and Cut
The first step is to measure and cut your boards. You’ll need 2 boards to complete each shelf, one for the back piece and one for the shelf. My windows are 11 ft. long, so I made my boards 12 ft. long so the picture ledge would hang over the end of the windows by 6 in. on each side.
Sand and Stain
The second step is to sand down any rough spots on the wood. This can be done with sandpaper or a palm sander. It doesn’t have to be perfectly smooth, but the smoother you get it, the easier it is to dust. Once your boards are all sanded down, apply a stain or paint. I love this stain and poly in one, but a regular stain, or even just clear poly would work too.

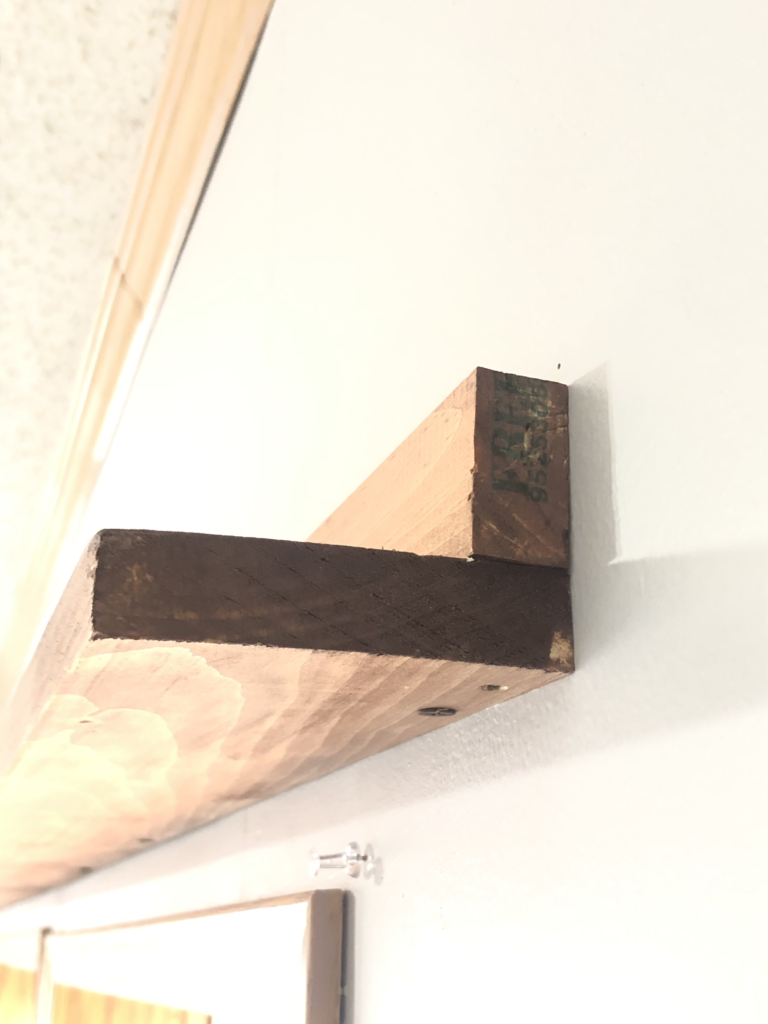
Attach Ledges Together
Place one board on top of the others and put several screws into the bottom to hold them together. I used 3 screws in each 6ft board for a total of 6 screws. I also like to drill pilot holes to keep the wood from splitting. Make sure you use a drill bit smaller than the screw to do this. Once your picture ledge is together, you are ready to hang it up.
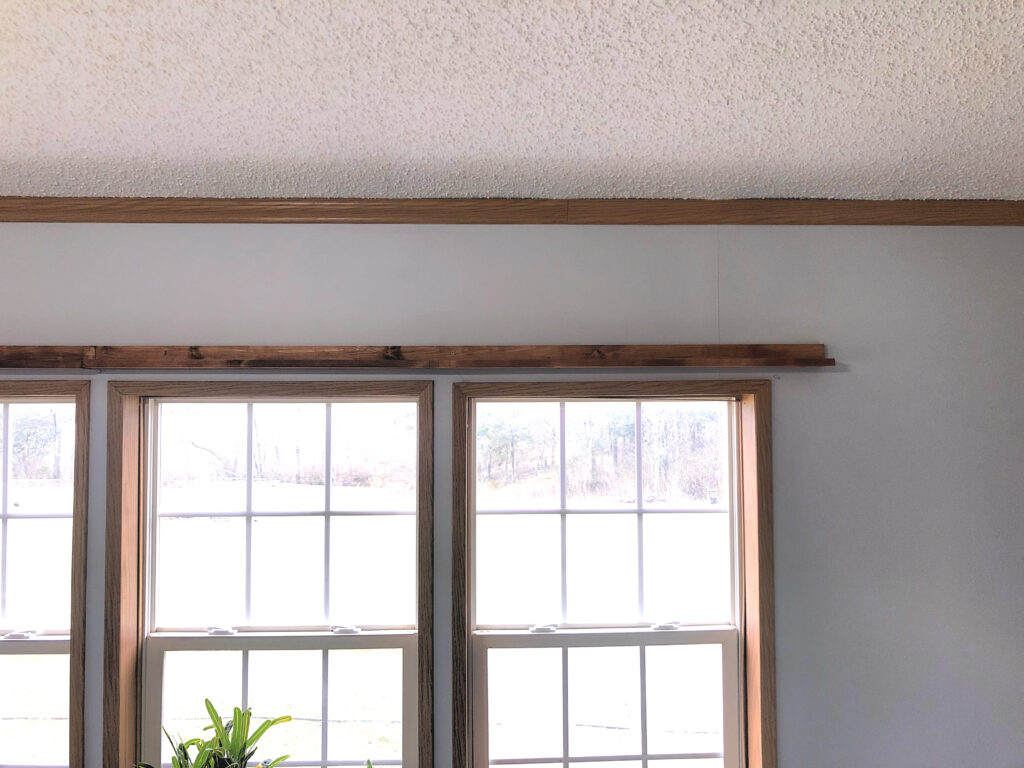
Hang Ledges
If you are using a stud finder, this is your chance to locate the studs. I prefer to hang shelves directly into studs rather than messing with drywall plugs, but the spacing isn’t always as even as I’d like it. The location of the screws doesn’t really matter for this project because they will most likely be covered up by the pictures and items you set on the shelf. My shelf is also high enough up, that I can barely see the screws when I am standing below it.
Choose Items to Display
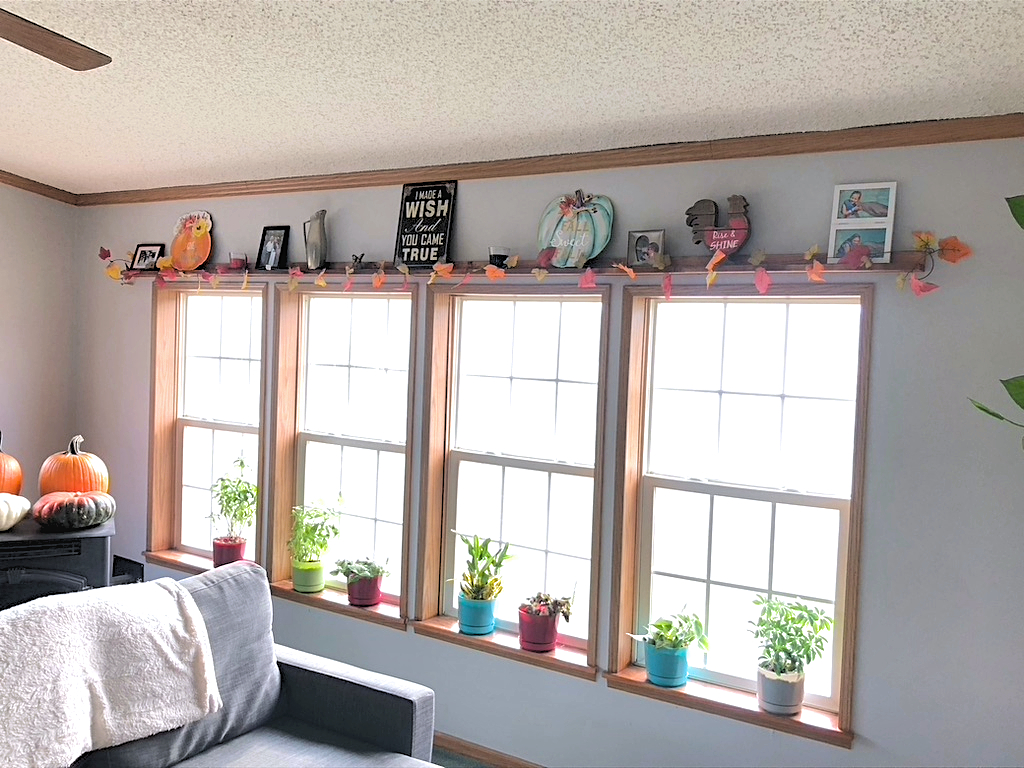
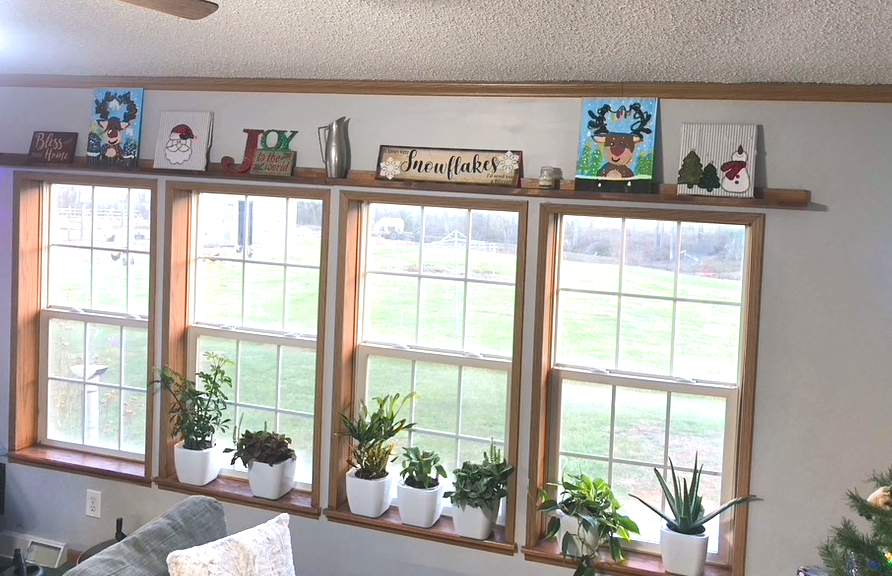
Yeah! Now for the fun part. Decorate your ledges any way you want! Family pictures, artwork and small items that are sentimental, the possibilities truly are endless. We regularly trade out items as new photos are taken or artwork comes home. Pretty much anything on the smaller side looks great. I love to change mine up for the holidays too!
Family photos for most of the year:
Change it up with some leaves for fall:
Christmas artwork and tea towels:
I love having the space to display the things that mean the most to our family. I really don’t think you can have too many shelves, or maybe I have an addiction…either way it makes me happy.